
Lenticular Tamagotchi Charm Tutorials

Previously, we made a lenticular Tamagotchi charm using DIY acrylic, but we didn’t manage the sizing well at the time. As a result, there was an extra transparent gap around the lenticular sticker in the center, which didn’t look very polished.
The previous one:

This time, we’ve carefully retested the cut lines to perfectly match the dimensions of the lenticular stickers available on our website.

Next, I’ll guide you through the steps to create your own custom lenticular Tamagotchi charm. I’ll also include the template and cut line files at the end, which you can download for free.
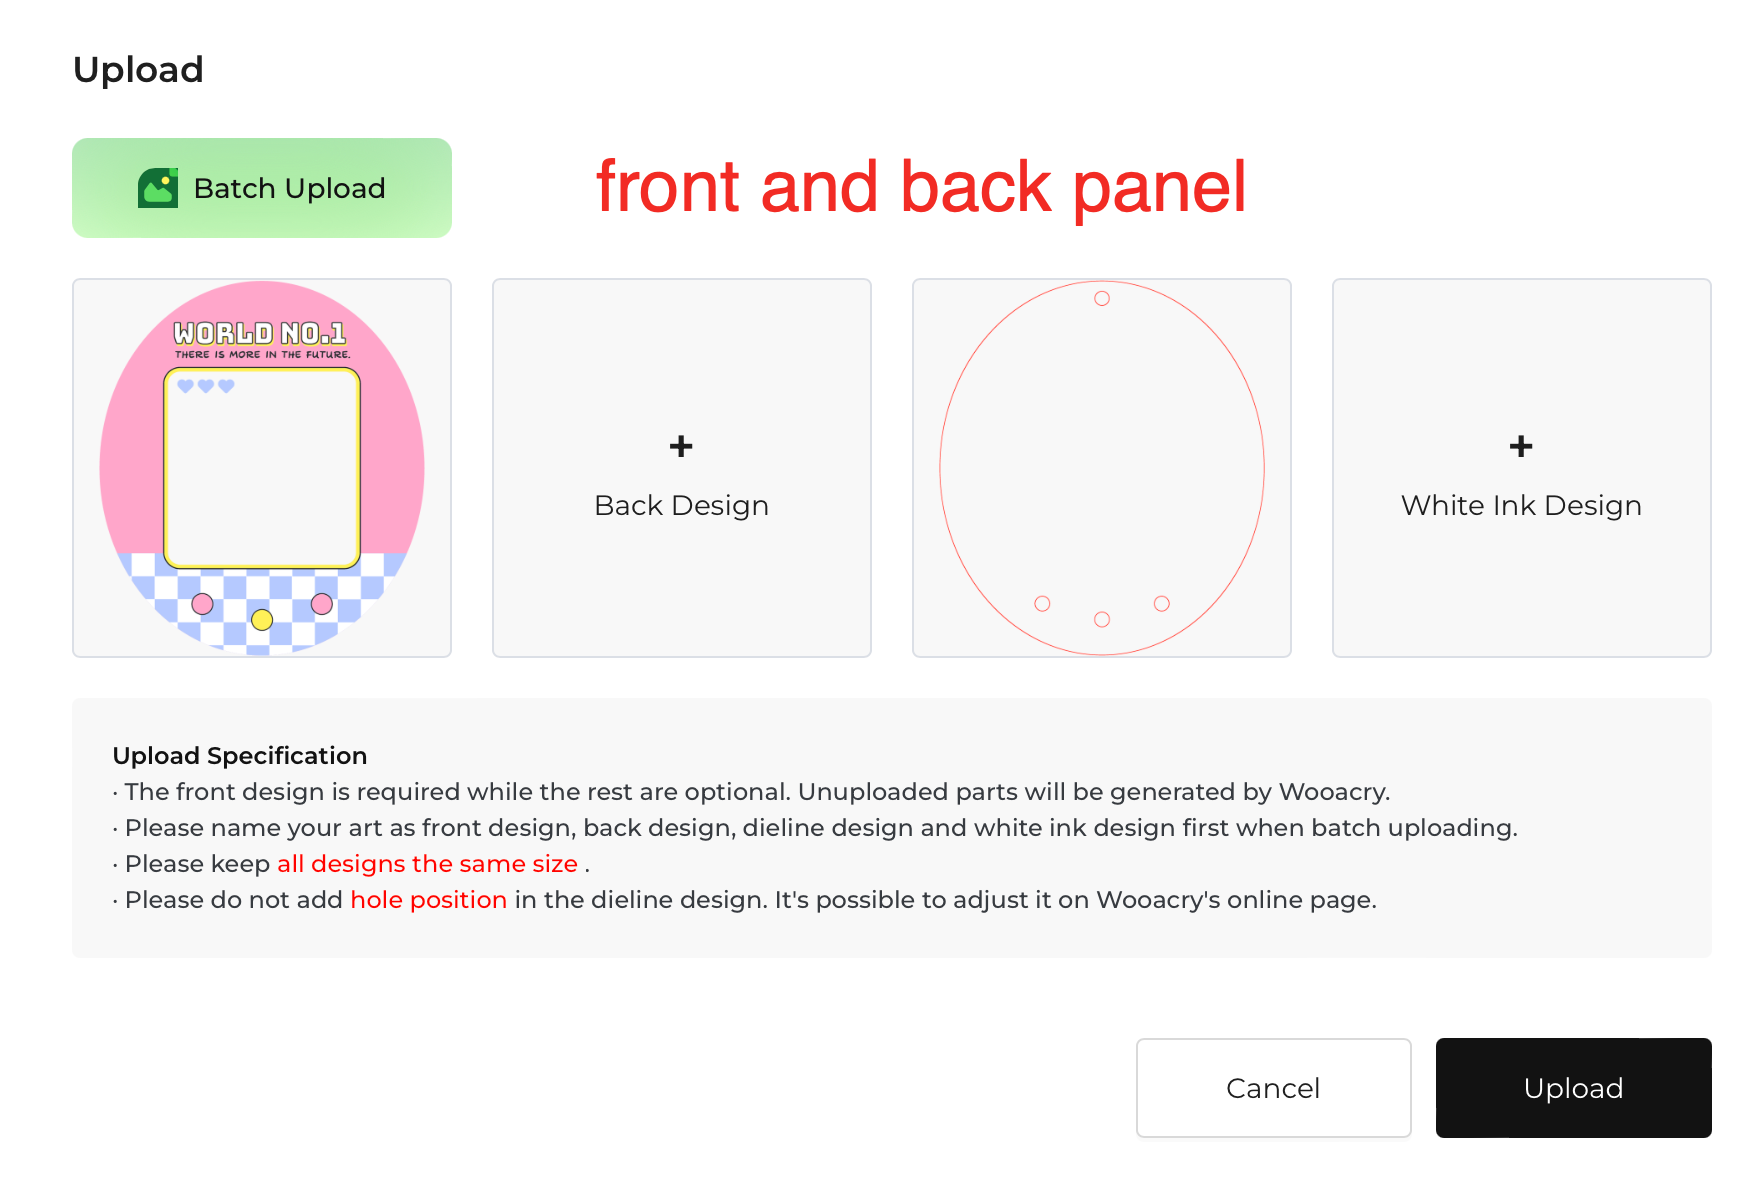
You actually only need one design image, but if you want different designs for the front and back, you’ll need two design files. For our example, we just used one design.
You’ll also need two cut line files:
One with a hollow center for placing the lenticular sticker. One without a hollow center for the front and back panels (otherwise, the lenticular sticker might fall out).
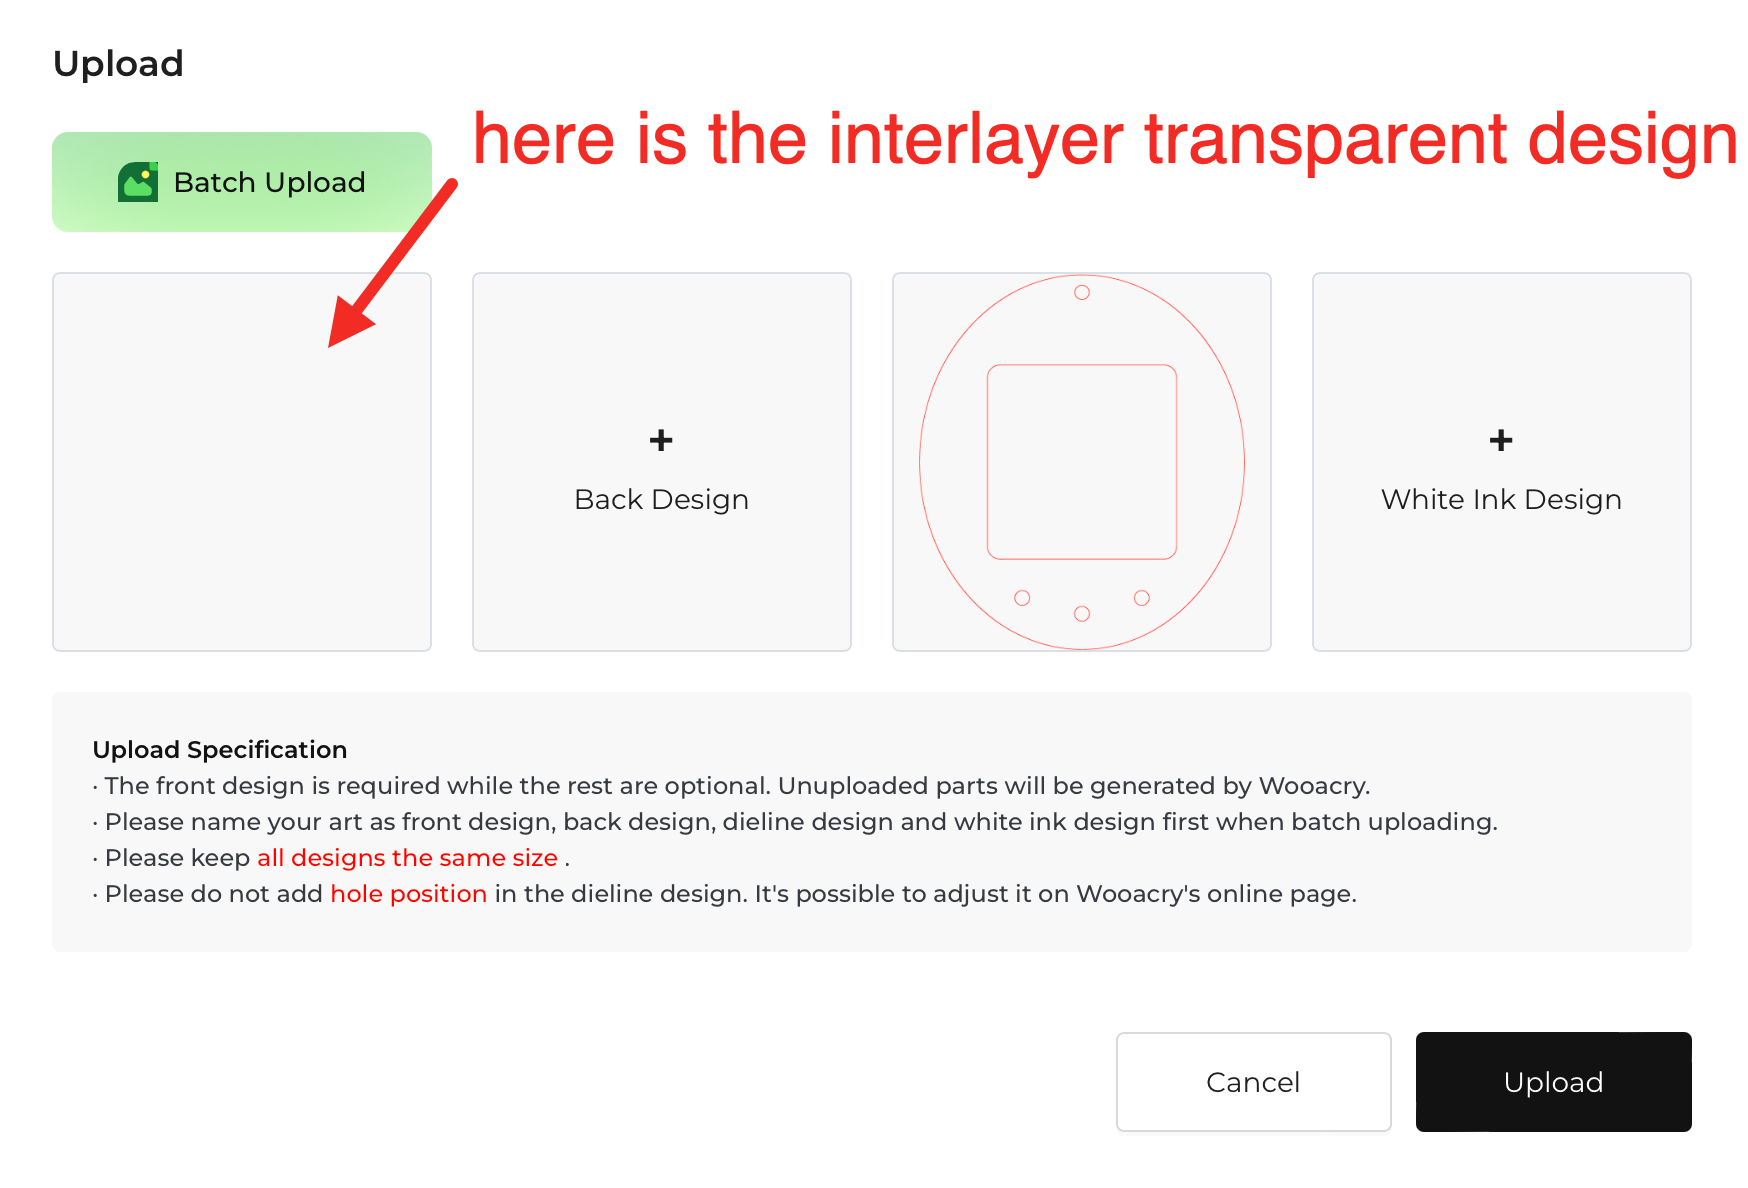
Finally, you’ll need a transparent piece, which should match the exact size of all your design and cut line files.

And those are what we got:

Please ignore the different designs ^^
The file of video tutorial is too large so I can’t upload it here directly, but you can access it on our Discord!!

But I can show you the screenshot of those two steps, how to upload the front/interlayer/back with the dieline.
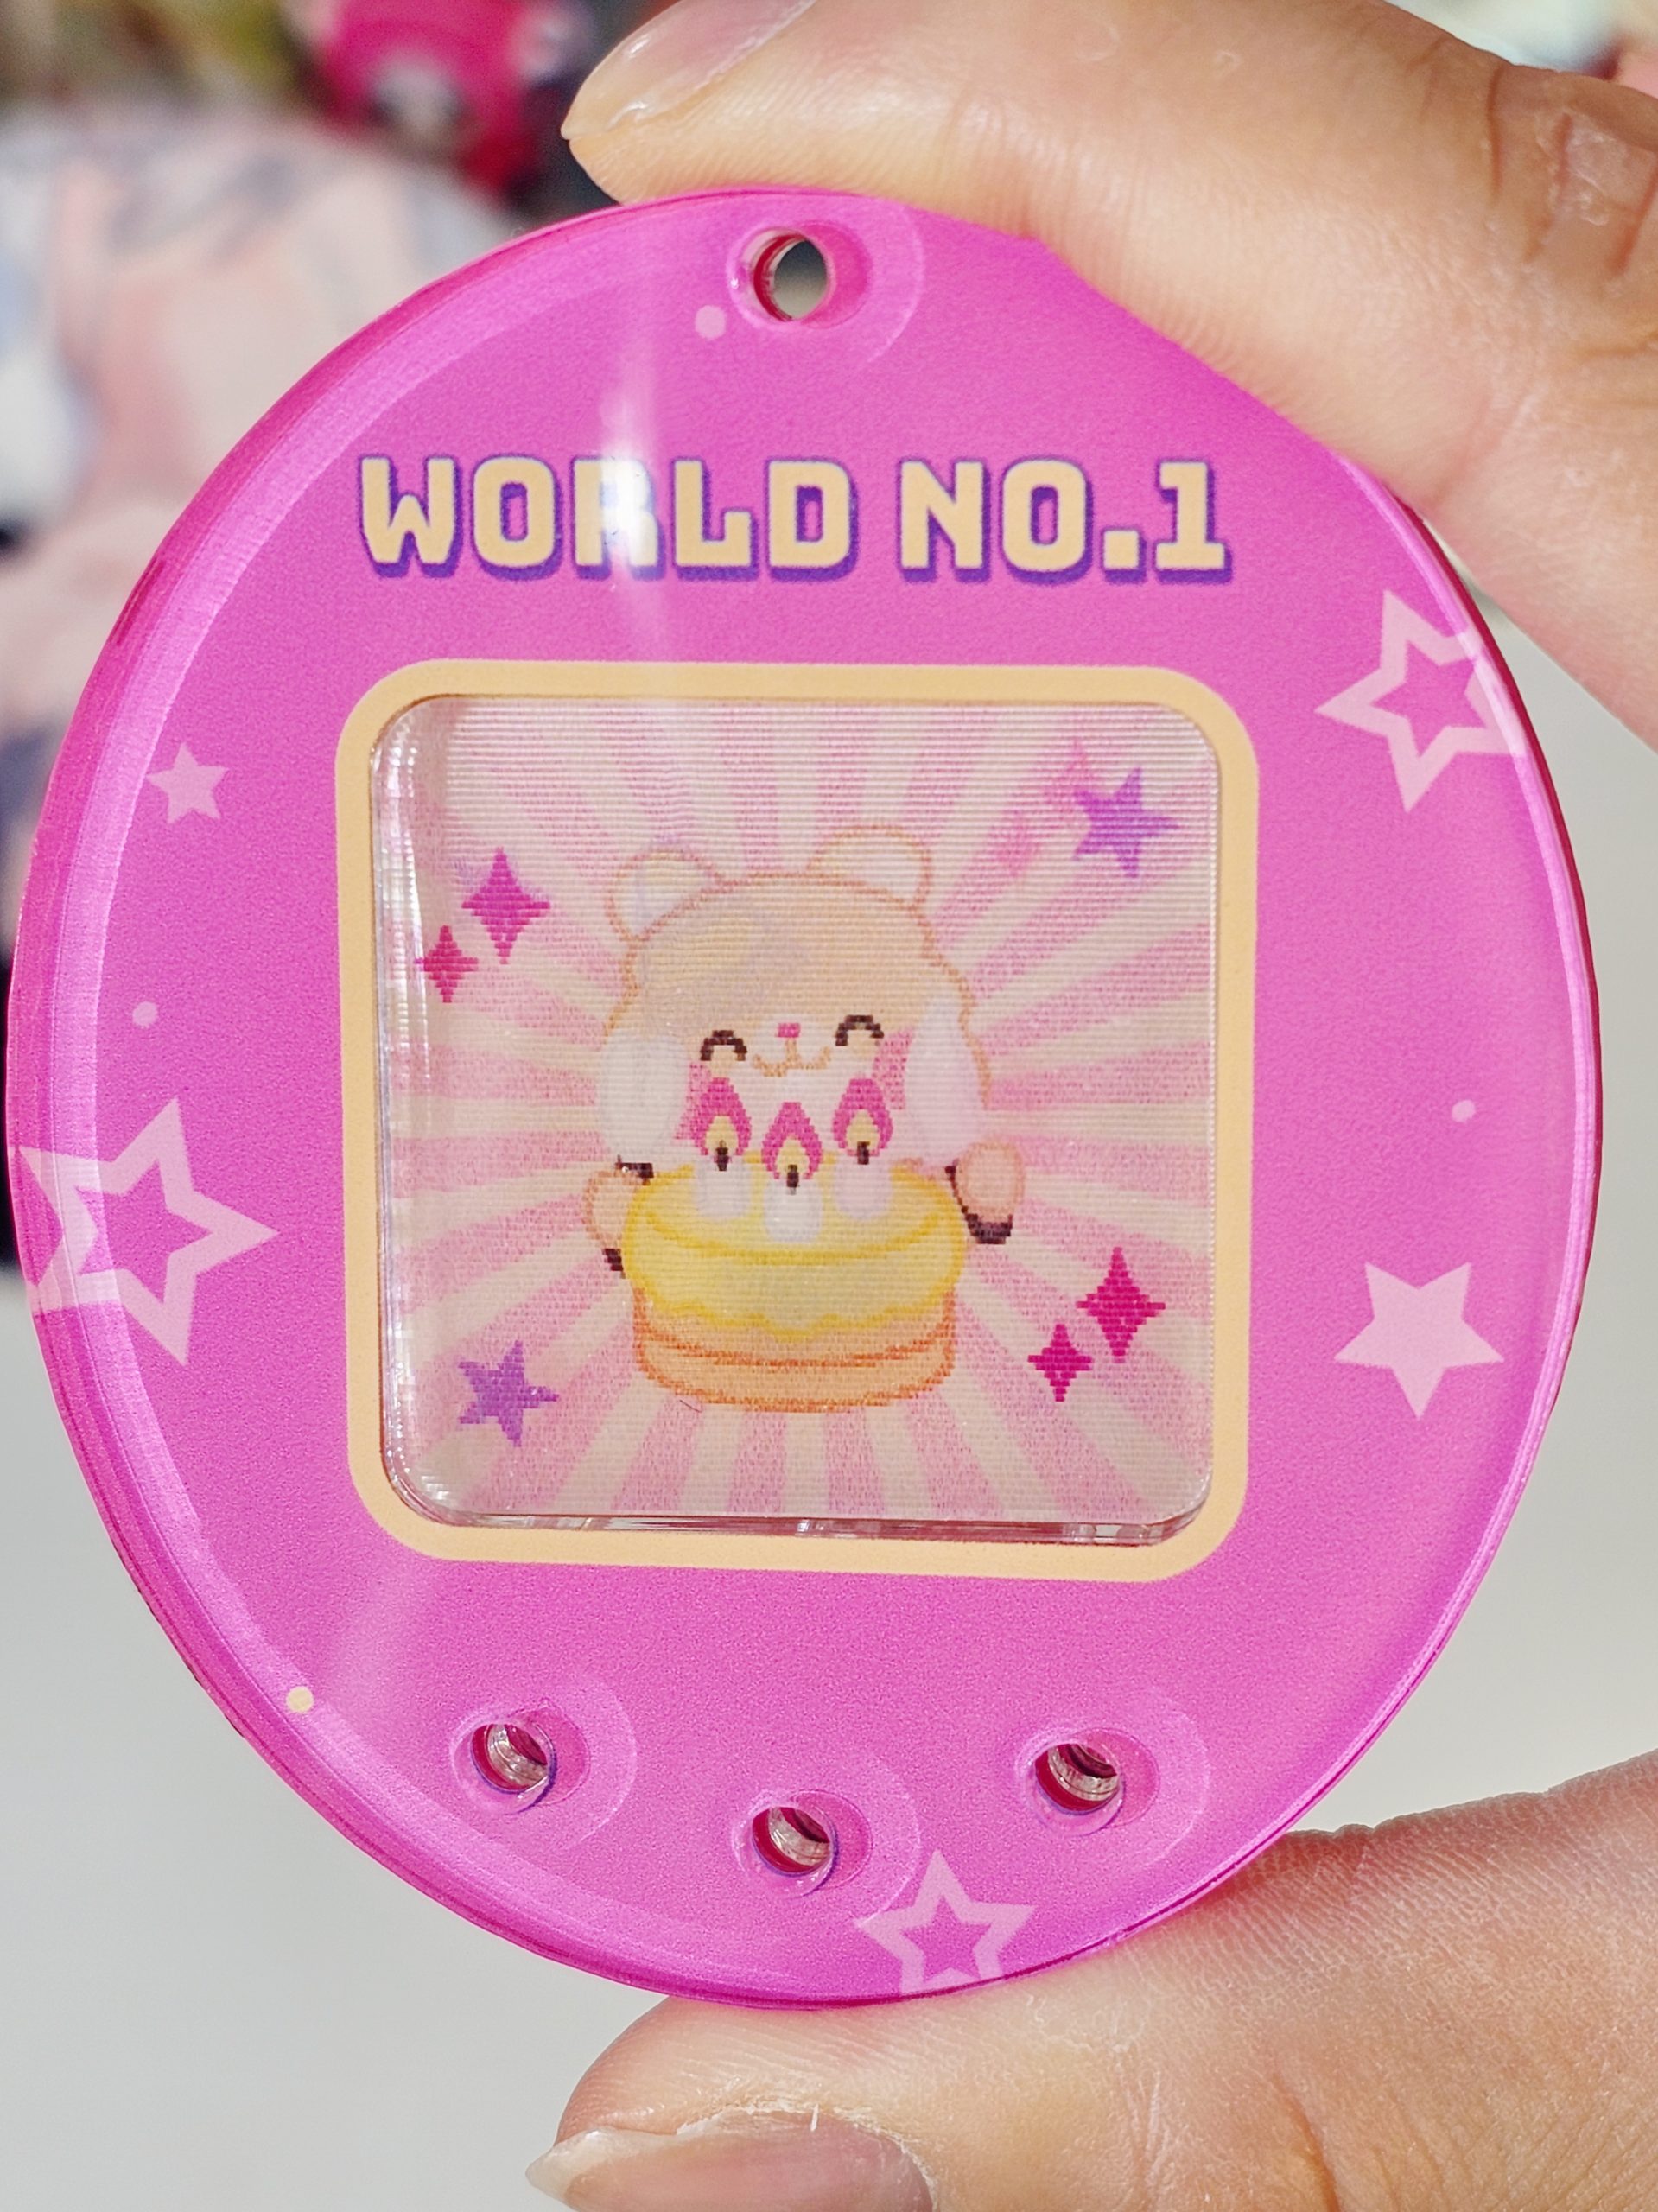
Here are some sample pieces for your reference. The lenticular sticker used is the one listed on our website, and the size is perfectly matched, so feel free to place your order with confidence.
You can even prepare a variety of lenticular stickers and swap them out inside the charm whenever you like, adding more variety and fun!
Here are a few things to note:
Please avoid choosing any hangers other than the bead chain style, as they won’t fit.
Our die-cut template already has the hole positions pre-set, so please do not add holes yourself.
For the sample we provided, both the front and back panels have a hollow design in the center. Therefore, we purchased two pieces of diffraction film, and during assembly, they need to be placed back-to-back so that both sides will have the diffraction effect. Of course, you could also modify the back panel to be opaque, in which case you would only need one piece of diffraction film.
We support 2mm acrylic sheet in DIY acrylic, so you can make it with 2mm for them if you want it to be more thinner. Of course, you can make it as a shaker lenticular charm, that would be 2mm for the front & back, but the interlayer should be 3.5mm so you can put the shaker pieces inside.
You can download the template here
That’s all, save your designs and then you can order it at anytime!!
Please Have a try!!
Please have a try with our DIY design acrylic