Wooacry

Public Holiday: September 15th – 17th

Vending machine shaker standee

*All images are original creations by the author. Please do not use them for any purpose without authorization!

Made a vending machine shaker

This is my personal paid commission from MIHUASHI (artist ID: 540588) please do not use the images without permission!

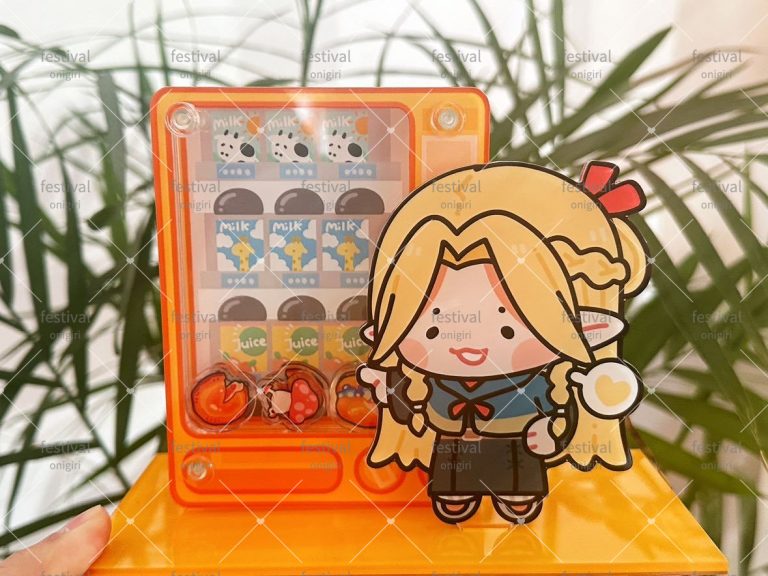
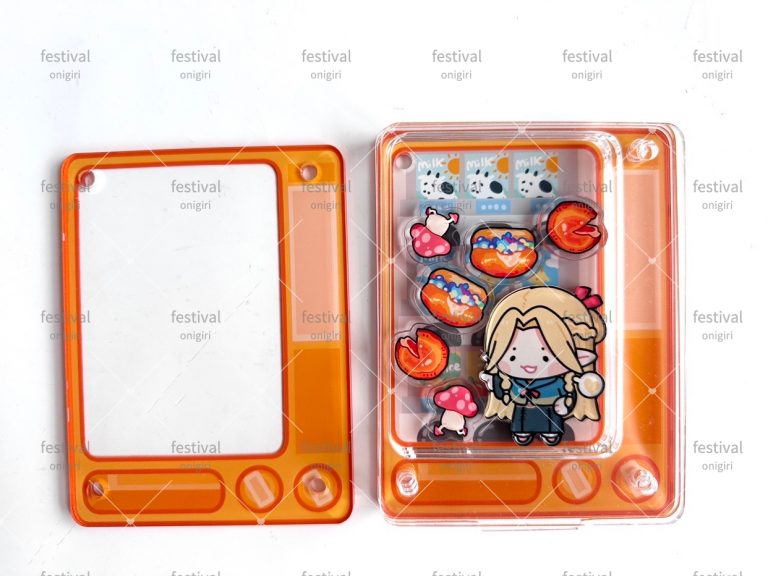
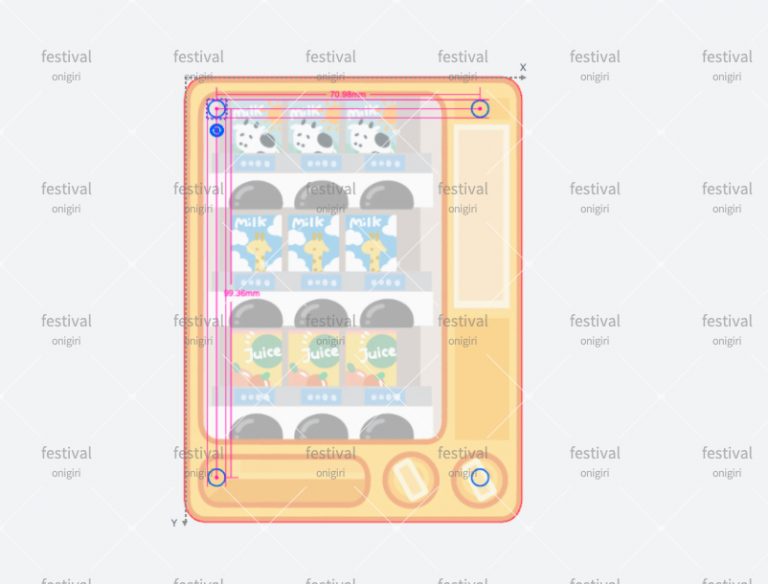
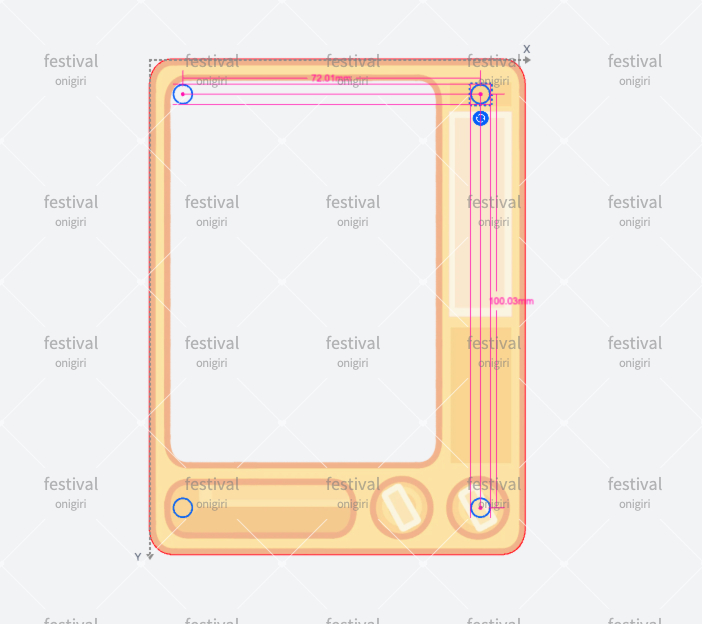
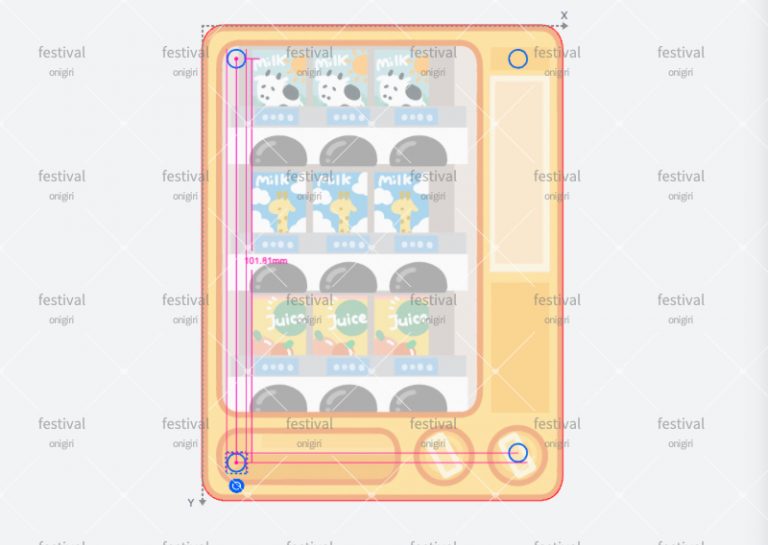
The main structure is divided into five acrylic panels that make up the vending machine, a base, plus a standee, and some acrylic shaker pieces.

Also need four 5mm transparent snap fastener as a connecting component.

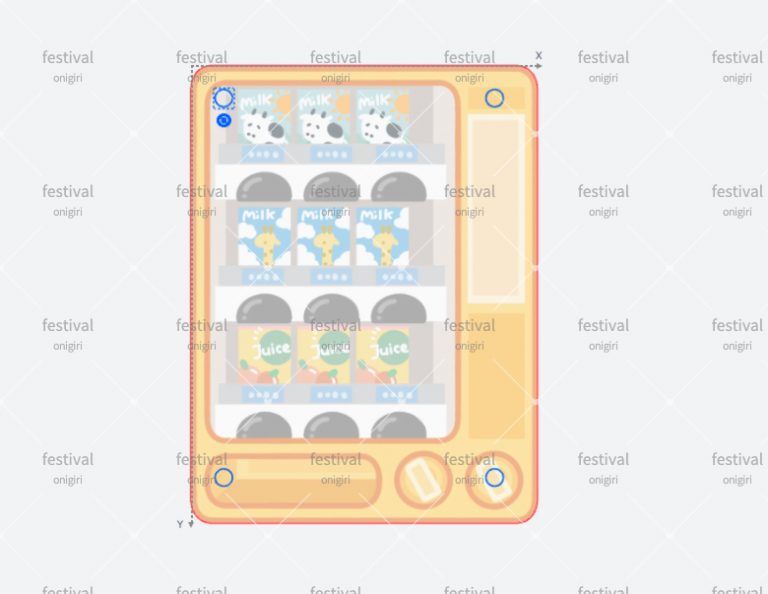
Five layers of acrylic panels, need to upload two pictures, respectively, the front and back. Make three layers of clear acrylic sheet in the center.

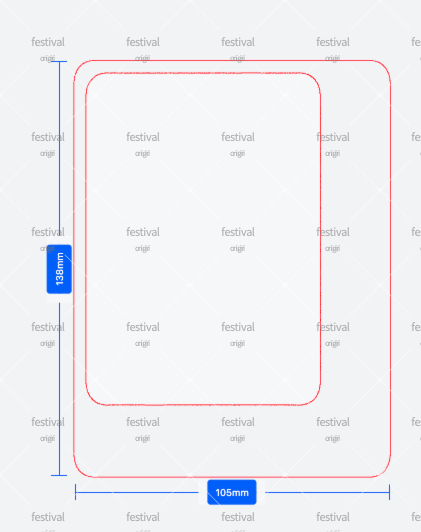
The cutting line layer of the vending machine will be uploaded directly after it is done, the size I made is 105mm*138mm, you can modify it as needed.

Add the connection holes in each of the four corners of the vending machine. The size of the holes is 5mm.

All five layers of acrylic need to have holes punched in the same locations in all four corners.

It’s kinda convenient to have a standard line when adjusting the connection hole position, or you can control it by coordinates.

The clear acrylic in the center needs to be added a standee insert hole, 30mm, for insertion into the base.

The base needs to have two connection holes in it, one for the main body of the vending machine, 30mm, and one for the character standee, 15mm.

Finally, upload some acrylic pieces that you want to put into the shaker.

After receiving the acrylic, connect the five pieces of acrylic together through four 5mm clear snap fasteners and insert them into the base and you’re done!

Share this page to your friends
festival onigiri
festival onigiri
Articles: 1

Leave a Reply

Your email address will not be published. Required fields are marked *